How to Use GitHub to Work on a Help Project Collaboratively
If you need to work on documentation by several authors, you can use the ability of the HelpSmith help authoring tool (which you can download here) to store your help project (including topics, templates, project settings, and other data) in individual .XML files, which makes your help project fully compatible with modern version control systems.
So you can easily share your help project with other team members, edit and merge the same project's files, synchronize changes in a single repository, create branches of the help project, and thus benefit from the great collaboration capabilities available in GitHub, Subversion, and other popular version control systems.
In this article, you will learn how you can work on a help project collaboratively with GitHub which is one of the most popular platforms that provide hosting for project development based on the Git version control system.
How Does a Version Control System Work?
A version control system like Git allows you to create, share, and synchronize repositories that contain files of a project, which can be a software project, documentation project, or any other project type.
Git Repository for a Help Project
If you use the official GitHub Desktop client application, you can easily turn any folder on your computer into a Git repository. Please note that the Git version control system simply adds a special sub-folder (named .Git) with the repository-related data directly into the project's folder.
When you modify your help project (which is stored in a Git repository folder) with HelpSmith, GitHub Desktop allows you to instantly view the changes to the project's files, and also to commit these changes to the local repository, so the version control system will create a new revision of the project made by a specific user.
Local and Common Repositories
It should be noted that since Git is a decentralized version control system, the local Git folder (which contains the files of your help project on your computer) is considered as a full-featured Git repository as it contains all the revisions, branches, and other repository-related data.
However, team members working on the same project can synchronize their local repositories with the main Git repository, which should be stored on GitHub. Thus, your team can use GitHub and the GitHub Desktop application to work on documentation collaboratively.
Use the Unpacked XML-based .HSMP Format for Your Help Project
A version control system like Git determines what changes have been made to the project by analyzing and comparing lines (or blocks of lines) in the project's files with their previous revision. Hence, the key requirement for working on a help project by a team is the ability of the help authoring tool to store the help project in an open format (such as plain text, XML, etc.) which can be read and modified by external tools.
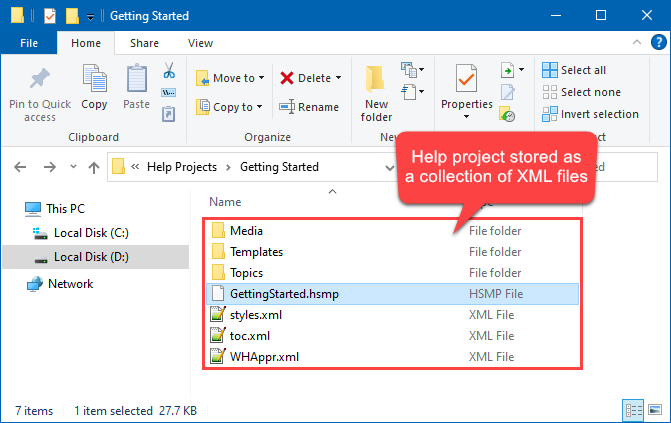
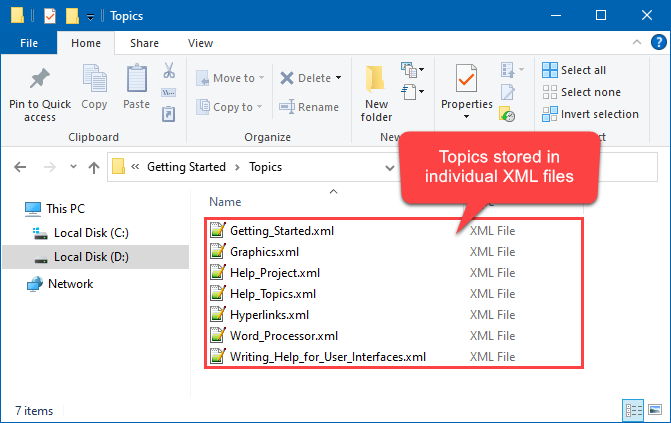
And while Git allows several users to edit and merge changes in the same files, it is important that at least the topics of your documentation project to be stored in separate .XML files because it will let you avoid potential conflicts, and, as a result, provide more efficient teamwork process.
How to Save a Help Project to the .HSMP Format
If you have an existing help project which is stored in the .HSMX (or .HSM) project format (which uses a single file container), you can save it to the open XML-based .HSMP format as follows:
- In HelpSmith, open your existing .HSMX (or .HSM) help project.
- Click the File tab, and then click Save As.
- In the right side, click Unpacked XML Files.
- In the Save As dialog, find or create the folder in which you want to store the help project.
Remark: Later you will turn this folder into a Git repository. - In the Filename box, specify the filename of the project's main file (e.g. MyHelpProject.hsmp).
- Click Save.
If your help project is already stored in the .HSMP format, then you can simply skip this step.
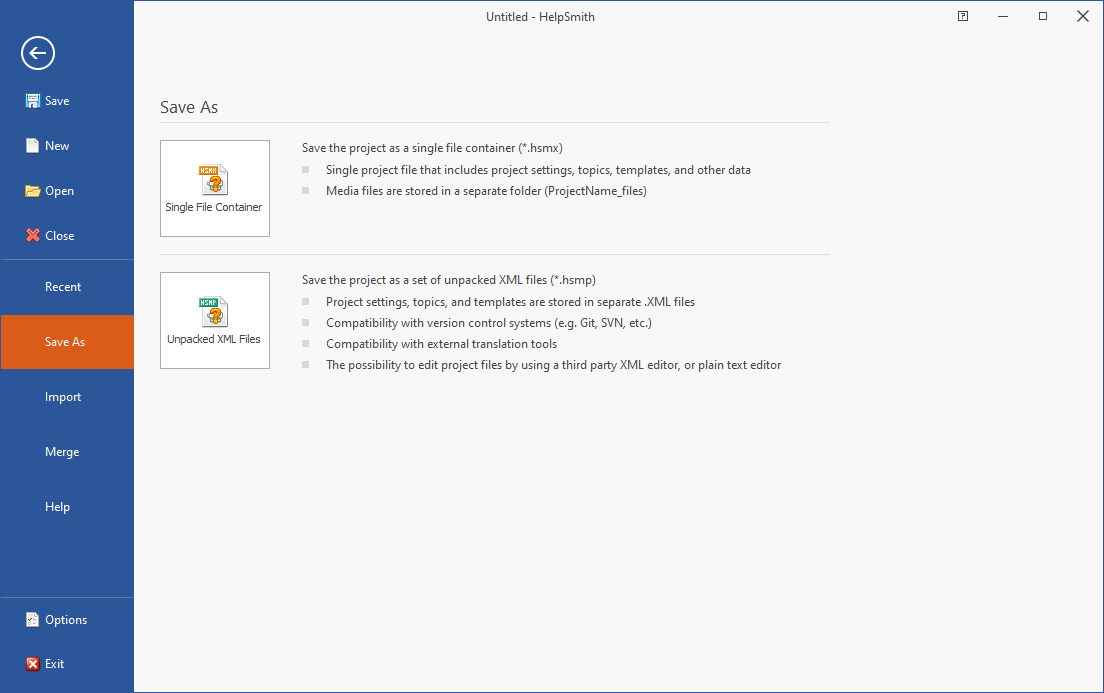
Please note that the ability to save your help project in the .HSMP format which stores your help project as a collection of individual .XML files is available in HelpSmith Ultimate (or higher) edition.
The .HSMP Format is Recommended for Large Projects
By the way, it should be noted that since the .HSMP format simply stores the help project data (topics, templates, etc.) in separate files and does not need to pack files into a single file container, it works faster in comparison with other project formats available in HelpSmith. Therefore, the .HSMP format is also recommended for creating and managing large help projects with a big number of topics.
How to Create and Manage Your Git Repositories
If you do not use GitHub yet, you can visit the GitHub website and register a new account.
While you can create and manage repositories directly in your GitHub account, we also recommend that you download and install GitHub Desktop which is an official client program that allows you to create a Git repository from your help project's folder, instantly view changes that you made to the help project's files, publish changes to the common repository, create branches, and perform other Git-related operations easily.
To Create a New Git Repository
- Sing-in to your GitHub account, and click the New (or Start a Project) button.
- Specify the repository settings (Repository name, description, etc.).
- Click Create Repository.
How to Manage Your Git Repositories
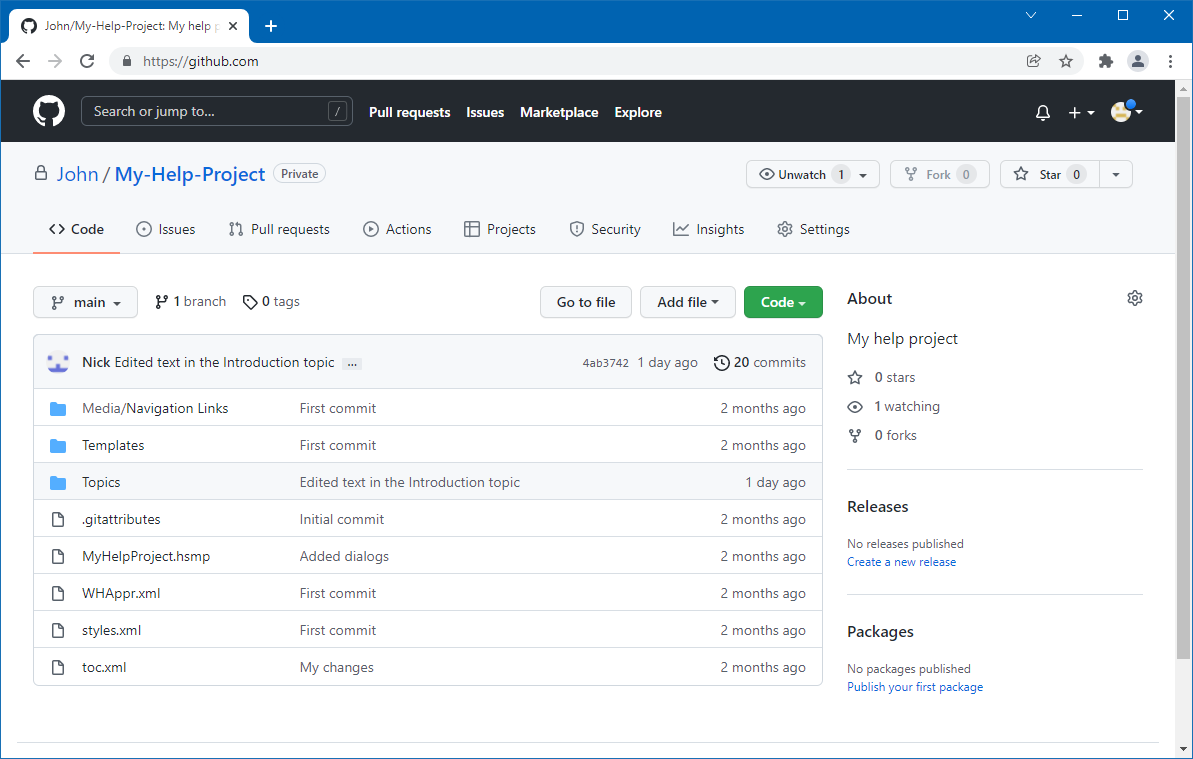
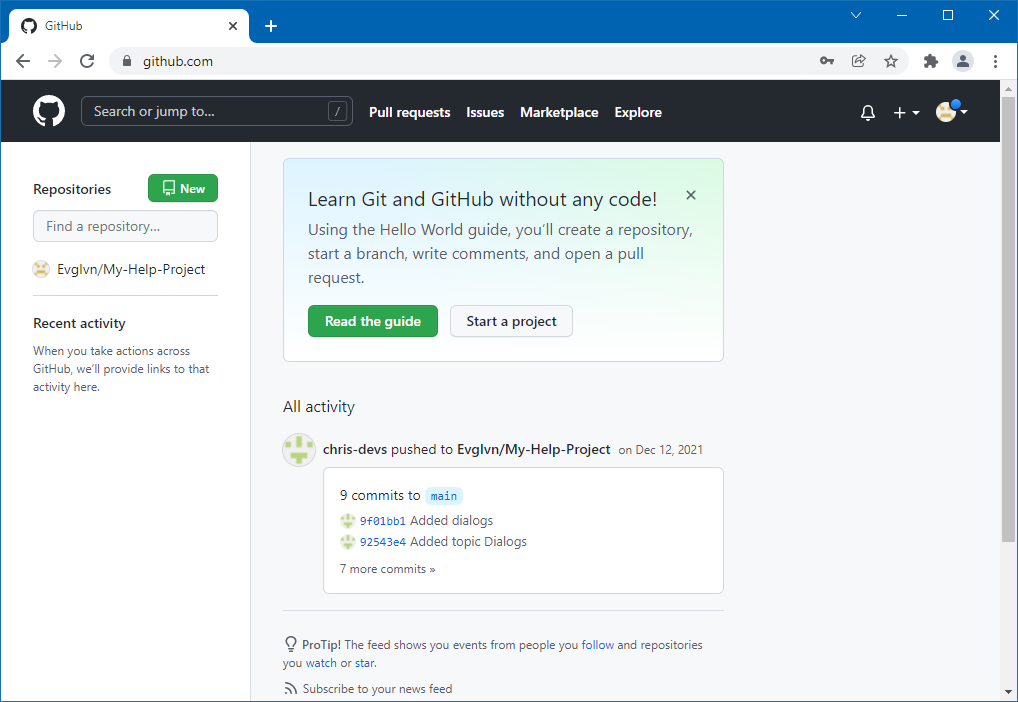
After you have created a new repository, you will find it in the Repositories section on the GitHub website. Also, you can view the list of your repositories in the GitHub Desktop application by clicking the View|Repository List command.
Please note that to work on a help project collaboratively, each team member should use a personal GitHub account and also install the GitHub Desktop application on their computer, so your team will be able to merge and synchronize the local copies of the help project edited by several authors.
How to Invite Collaborators to Your Help Project
Before your team members can collaborate to your help project, you should visit the repository's access settings on GitHub, and invite the users who will be able to access the project's files and publish changes.
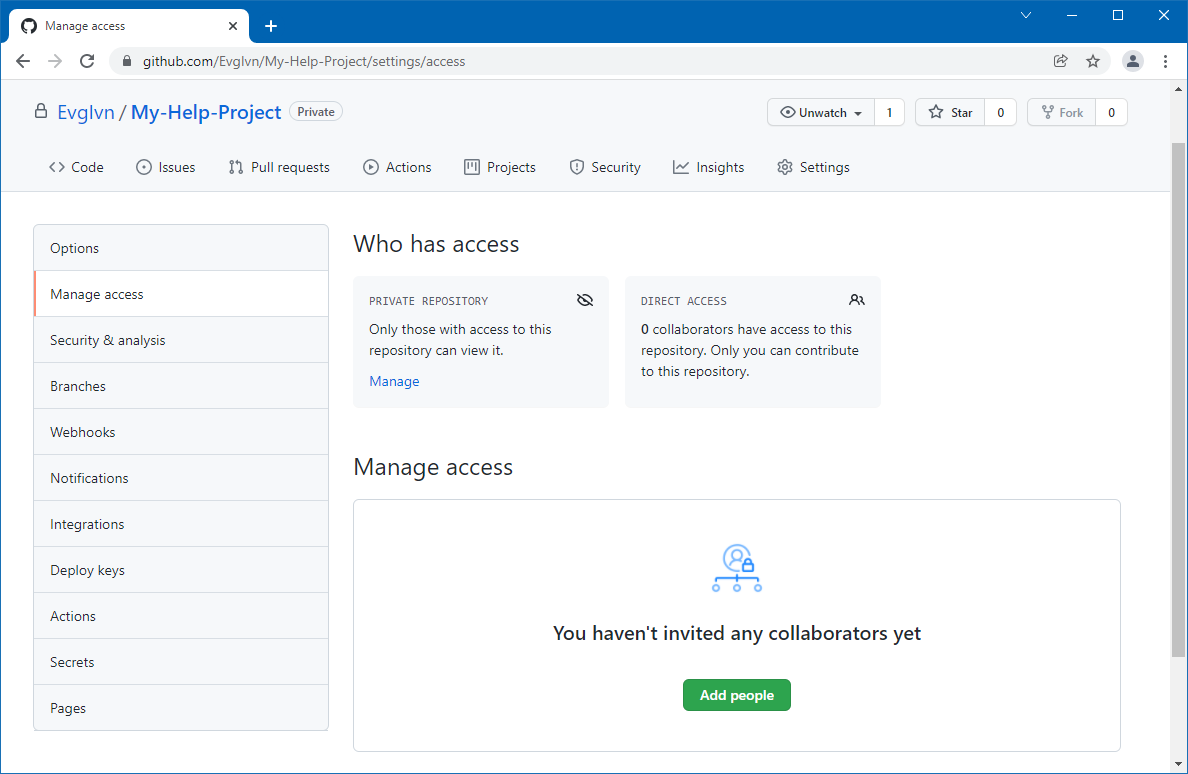
How to Add Users to a GitHub Repository
- In the web browser, sing-in to your GitHub account, and go to the Repositories section.
- Select the repository with your help project.
- Go to the Settings tab, and then, in the left sidebar, select the Manage Access section.
- Click Invite a collaborator, and enter the user who you want to invite.
Remark: To invite a user to collaborate to the selected Git repository, you can enter the user's name, full name, or email address. After you have invited a user, GitHub will send an invitation to the user's email address that they will be able to accept.
Committing Changes to the Local Repository
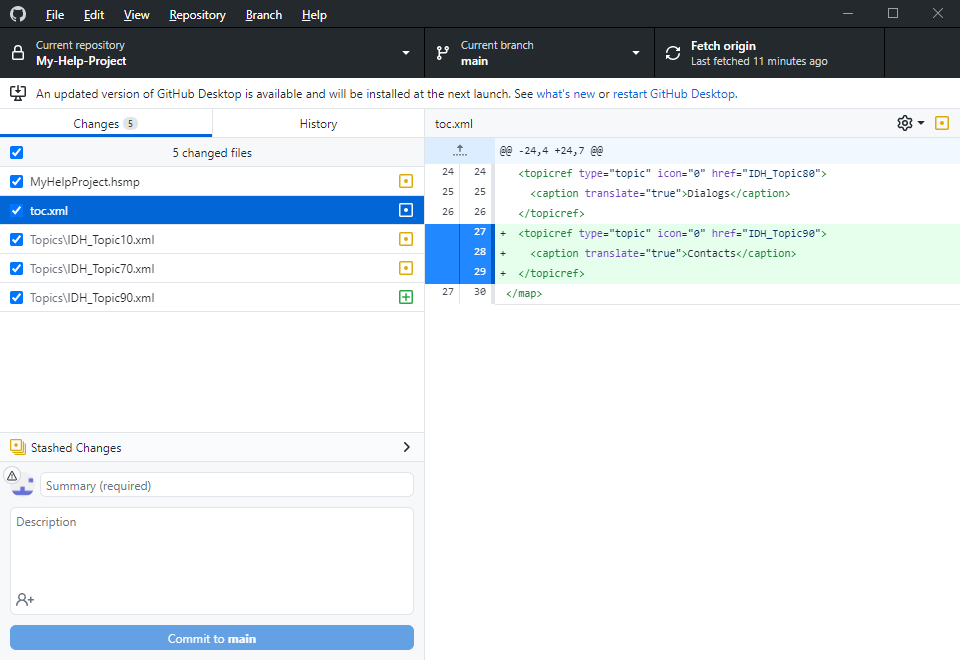
As mentioned above, the local Git folder on your computer, which contains your .HSMP help project is a full-featured Git repository. Therefore, after you have made some changes to the project's files (for example, after adding a new topic, deleting an existing topic, or editing text of a topic) and then saved your help project (by using the File|Save command, or by pressing the Ctrl+S shortcut key), you need to commit these changes to your local Git repository.
By the way, in the GitHub Desktop application, you can instantly see all the changes in the specific files of your help project. Please note that before you can publish these changes to the common repository on GitHub (which can be accessed by other collaborators), you should first commit them to the local repository.
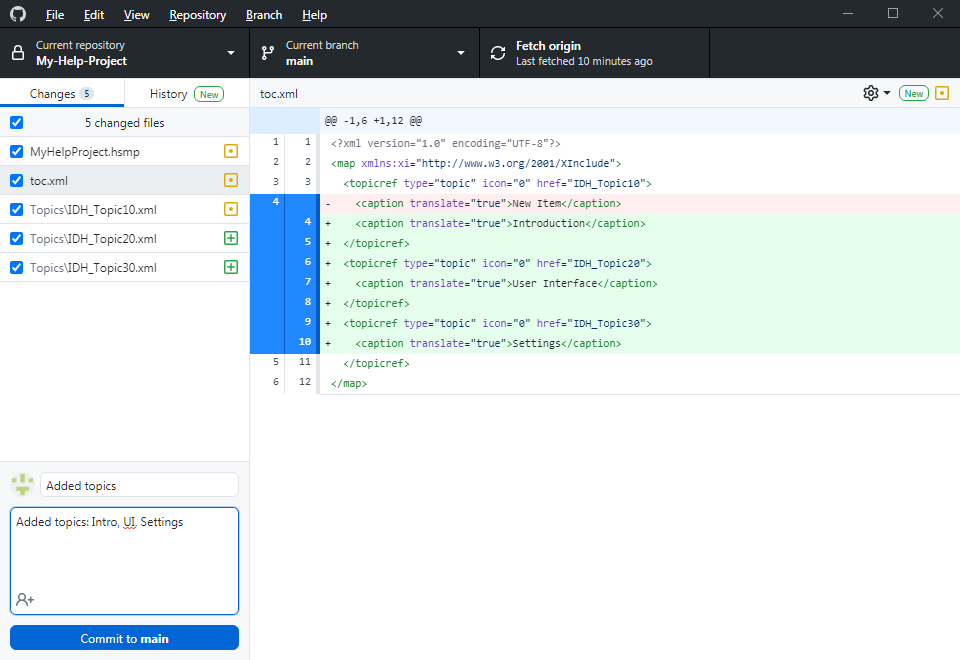
How to Commit Changes to the Local Repository
- In GitHib Desktop, click the View menu, and then click Repositories.
- Select the repository with your help project.
- Review the changes made to the project's files.
- Enter a comment to describe this commit.
Remark: Git requires that you provide a short comment, so you will be able to identify a specific commit in the future. - Click the Commit button to commit the changes to the currently selected branch.
Using Branches of a Help Project in Git
In most cases, you will make commits to the Main branch of the project, so this branch is selected by default. However, as a full-featured version control system, Git allows you to create other branches which can be useful while working on a particular version of the help project which is planned for a future release, etc.
How to Publish Changes to the Common Repository on GitHub
After you have committed changes to the local Git repository, you can publish the changes to the common Git repository, which is stored on GitHub and can be accessed by other collaborators.
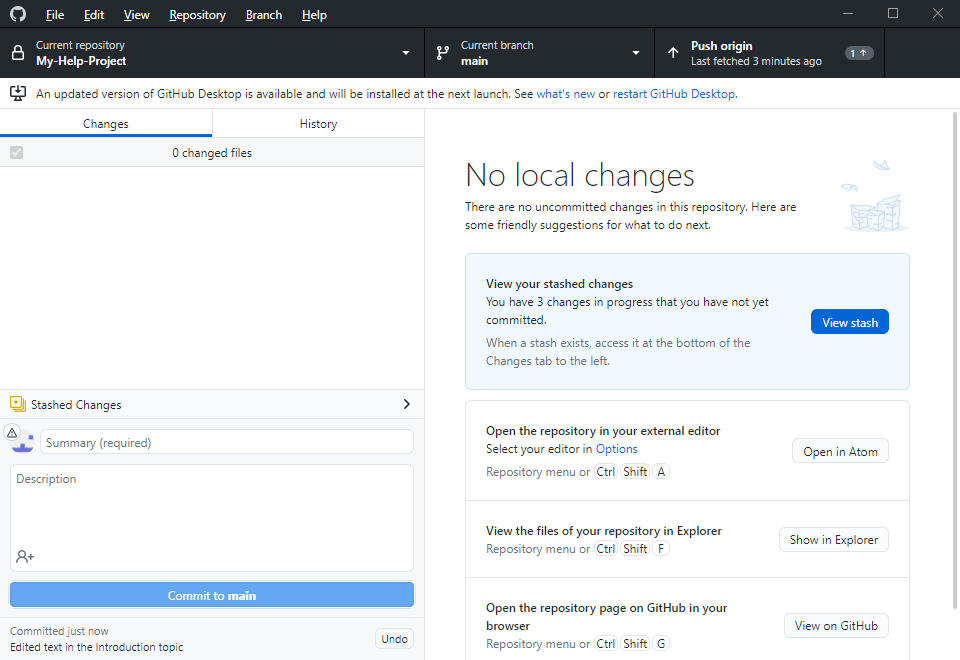
How to Publish a Repository
- In GitHub Desktop, click the View menu, and then click Repositories.
- Select the repository with your help project.
- In the top-right corner, click the Push Origin button.
Please note that after clicking the Push Origin button, GitHub Desktop will upload the changes to the common repository, and will also get changes to the help project made by other collaborators.
Thus, each member of your team working on the same documentation can collaborate to the help project and easily synchronize their local copies.
How to Resolve Conflicts During Project Synchronization
As a team member, you can use your HelpSmith copy to edit a help project which is stored in the unpacked XML-based .HSMP format, and then use the GitHub Desktop application to commit changes to the local Git repository (which is stored on your computer), and also to synchronize the local Git repository with the common Git repository (which is stored on GitHub) by performing the Git's Pull and Push commands.
Please note that when you add new topics, delete existing topics, change texts of existing topics, change some settings of the help project, and then save your help project (by clicking File|Save, or by pressing the Ctrl+S key), HelpSmith changes the appropriate files in the project's folder. Thus, from the Git's point of view, HelpSmith simply modifies individual files in the local Git repository folder containing your help project.
While working on a help project by several authors, most changes in the project's files will be merged automatically since the version control system analyzes the modified lines (or blocks of lines) in the project's files and then synchronizes the changes.
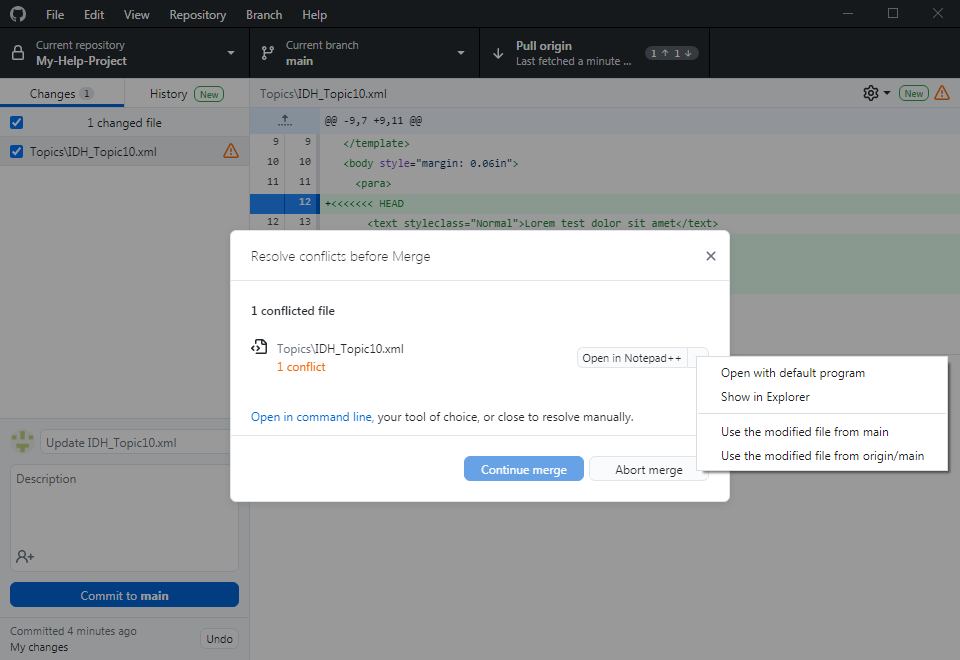
However, in some cases, when two or more users have modified the same line in a file, or added a new block of lines in the same place, the Git version control system may not be able to determine whose version of the file (or a specific block of lines in a file) should be used. In such a case, during the project synchronization, you may need to resolve the conflict manually. For example, you may need to select the version of the file that will be included to the common repository, or edit a conflicted block(s) in a file manually by using a plain text editor (like Notepad++).
How to Avoid Conflicts While Working on a Help Project by Several Authors
While editing documentation by several authors who can modify the same files of the help project, you may encounter conflicts while synchronizing the changes in your local Git repository with the common repository. However, you can follow these simple recommendations that will help you minimize the number of such conflicts and, as a result, simplify the collaboration process.
Editing the Table of Contents
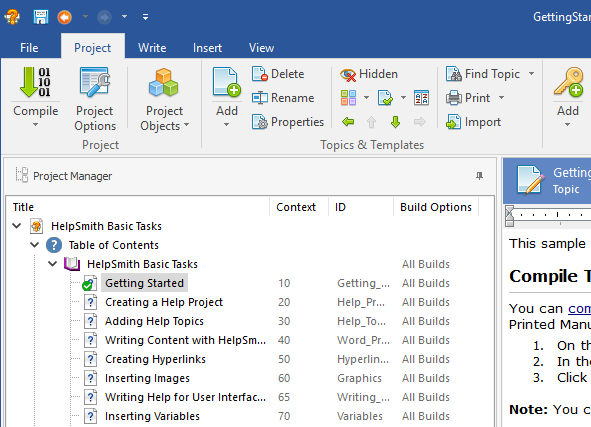
It is recommended that the Table of Contents (TOC) to be edited only by the project manager (not to be confused with the HelpSmith's Project Manager pane) who can add new topics or delete existing topics since if two or more users modify the toc.xml file which stores the Table of Contents of your help project, it may lead to a conflict during the Git repository synchronization process.
If you need to edit the Table of Contents by several users, each user should assign Context ID values while adding new topics only within the range of values allocated to that user (for example, from 10 to 1000 for one user, from 1010 to 2000 for another user, and so on).
Since the topics must use unique Context ID values, this approach will let you avoid conflicts associated with non-unique Context IDs assigned to topics by different collaborators in their working copy of the help project.
Editing the Content of Help Topics
In a team, you can assign members responsible for writing and editing specific topics (for example, a topic named "Hello World" with the Context ID value set as 10) in your help project.
Since in a .HSMP help project, the topics are stored in individual .XML files (in the ProjectName\Topics folder), if one file is modified by one user at the same time, this file will most likely be automatically synchronized in the common Git repository.
Of course, there are many situations when several authors may need to review and edit the same topic file together, and in most cases the version control system will merge the changes made by different users automatically. However, in a situation when several users add changes to the same line (or block of lines) in a file, it will put the file in a conflicted state.
How to Resolve Conflicts in a File
If GitHub Desktop finds a file in the conflicted state, it allows you to resolve the conflicts in one of the following ways:
- Apply the version of the entire file from your project copy.
- Apply the version of the entire file from the common repository (i.e. the version committed by other collaborators).
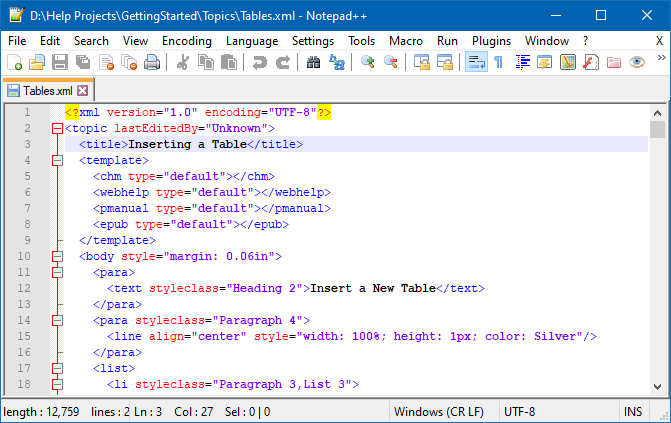
- Edit the conflicted .XML file in a plain text editor (e.g. Notepad++, Atom, etc.), review the conflicts, merge the changes manually, and create the final version of the file that will be published to the common repository.
Remark: It should be noted that if choose to resolve the conflicts manually, you should understand the DIFF format used by Git, and also the XML format used by HelpSmith.
Editing Templates
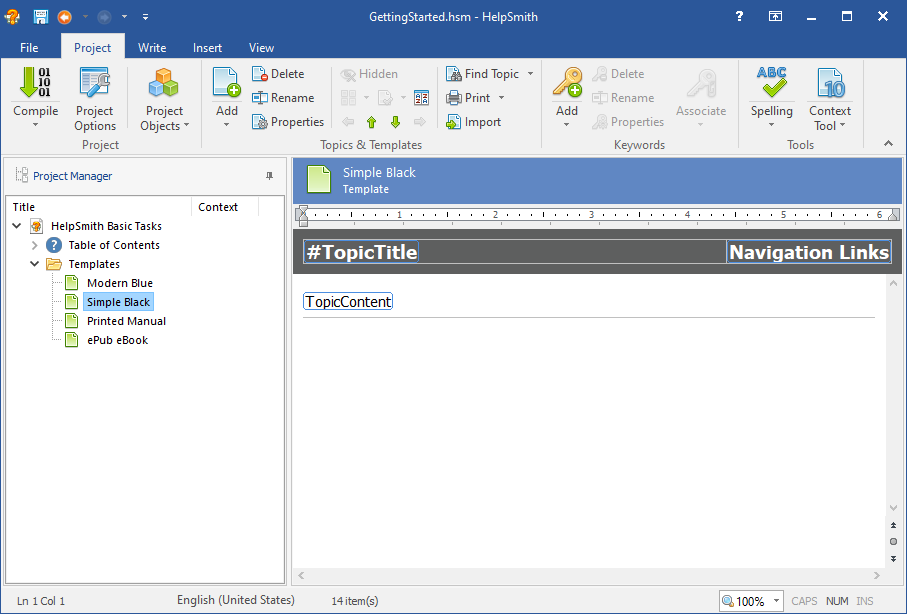
The list of templates (which you can apply to topics during the compilation process) is stored within the project's main .HSMP file, but, if necessary, it is also possible to move the template list to an external .XML file.
And similarly to the topics, the content of each template is stored in an individual .XML file (in the ProjectName\Templates folder), so the recommendations for editing templates will be the same as for topics.
Ideally, the project manager who is in charge for the entire help project can setup, edit, and apply templates to specific output formats. But if necessary, a template can also be edited by collaborators. However, please note that if several users modify the same texts or settings, it may lead to a conflict during the Git repository synchronization process.
Editing Styles and Formatting Settings
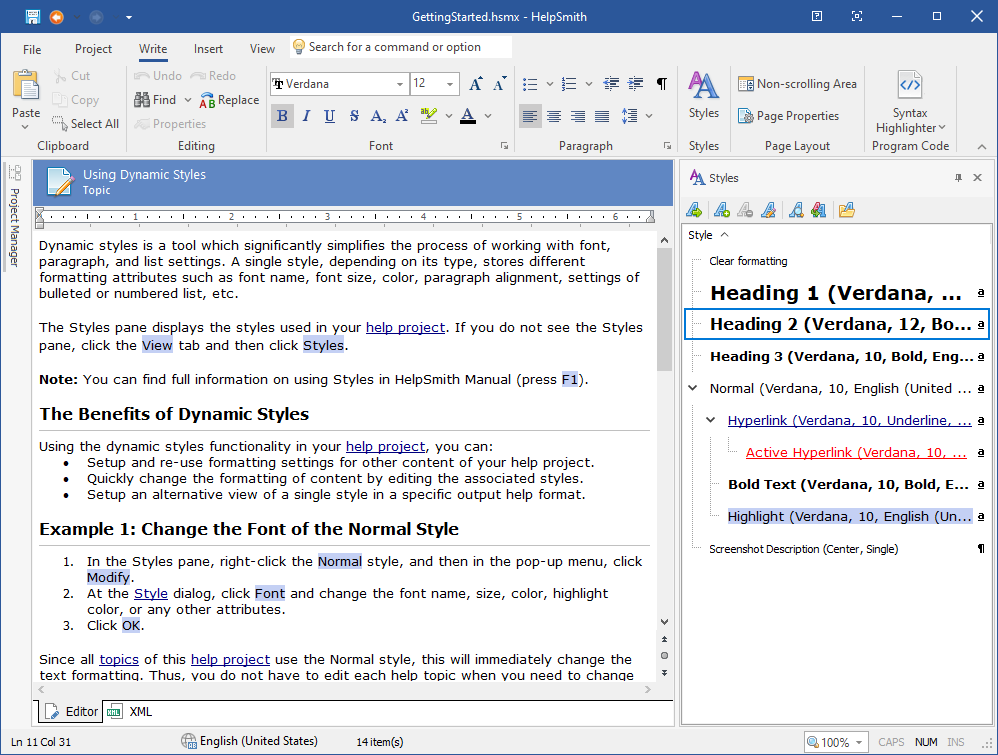
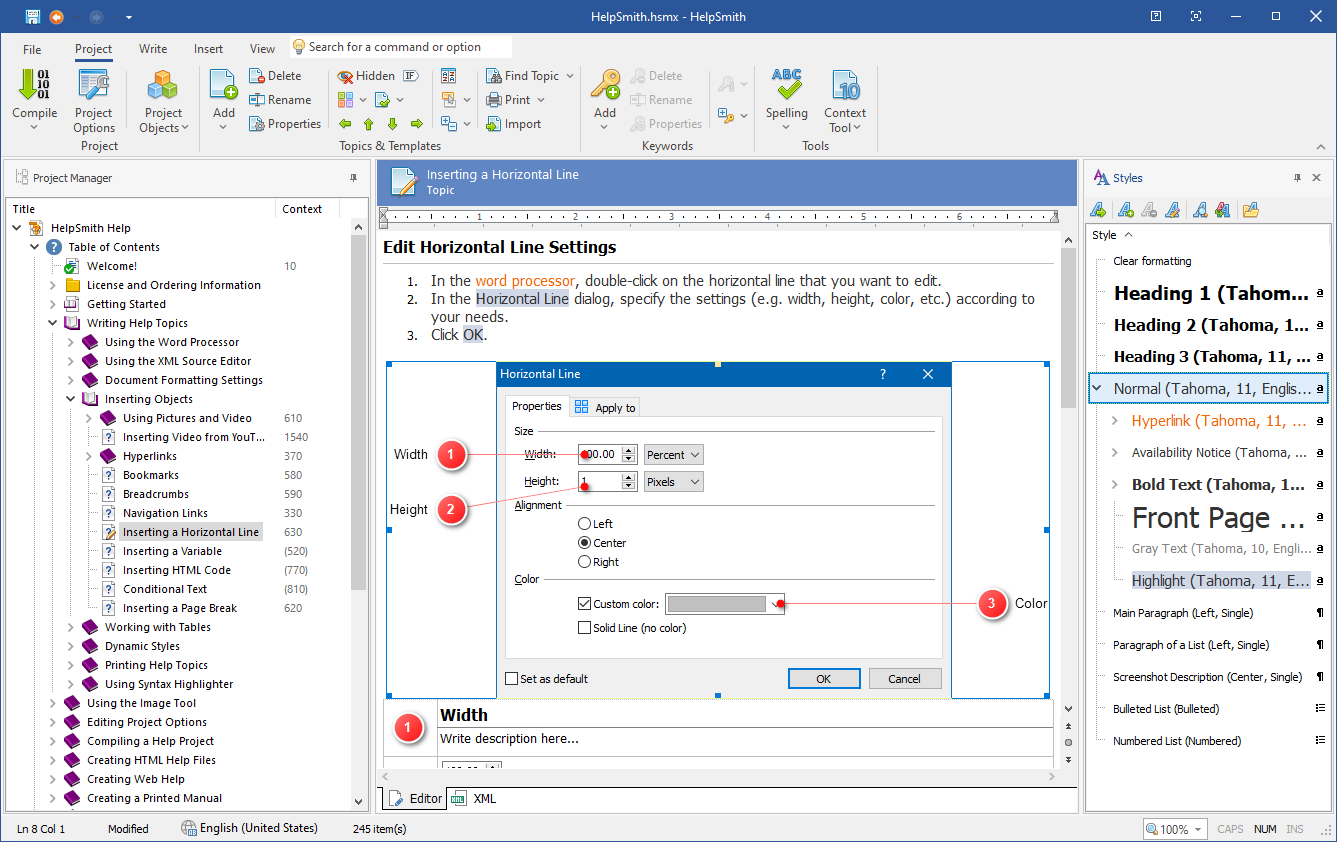
As you may know, the HelpSmith's word processor stores formatting settings in styles (e.g. Heading 1, Heading 2, Normal, etc.) which you can apply to the content (e.g. texts, paragraphs, lists, etc.) of topics.
Since in the same help project, all team members should use a single set of styles, the project manager can define the preferred formatting settings (View tab|Styles) for the reserved styles (e.g. Heading 1, Heading 2, Normal, Hyperlink, etc.), and also create user-defined styles that will be applied by other collaborators while editing the formatting of their topics.
Please note that in a .HSMP help project, styles are stored in the ProjectName\styles.xml file, so if this file is modified by one user only, it will let you avoid potential conflicts during the Git repository synchronization process.
Remark: It is important to note that if a team member applies formatting attributes (e.g. Font Name, Font Size, Bold Text, etc.) to the selected text in the HelpSmith's topic editor by using the appropriate commands on the Write tab in the Ribbon, HelpSmith will simply create styles with the appropriate settings (for more details, see the Automatically Created Styles section. However, if several users change formatting through the Write tab, their local Git repositories may have styles with the same names, but different formatting settings. Eventually, this will lead to conflicts during the Git repository synchronization.
Therefore, it is recommended that all users working on writing and editing the content of topics to apply only the styles available on the Styles pane (i.e. the styles which are defined by the project manager), and thus avoid potential conflicts with styles and formatting.
Other Conflicts
In many cases, even if all team members follow these recommendations during the collaboration process, conflicts cannot be completely avoided and using a version control system implies that you should be able to merge project's files manually. Fortunately, the GitHub Desktop application allows you to view and resolve conflicts quite easily. For example, if Git cannot merge changes in some file automatically, you can simply specify whose version of the file to use, or to edit the conflicted .XML file in a plain text editor. In some cases, the project manager may need to adjust the merged help project in HelpSmith by moving topics in the TOC into the right place, apply the necessary styles to the text, etc.
Conclusion
Using the powerful capabilities of the GitHub platform, you can quickly establish the collaboration process, and thanks to the HelpSmith's ability to store the help project as a collection of individual XML files, it becomes really easy to work on documentation by a team of technical writers who can plan and build the Table of Contents, setup styles, edit the content of help topics, prepare visual elements, and all other things together.
However, as the project manager who is in charge for the entire project, you should understand the key principles of using a version control system that allows a team to edit the project at the file level and merge changes in a single repository, and, if necessary, be able to resolve conflicts which may appear when the same files are being edited by several authors. At the same time, you can follow the simple principles mentioned in this article that will help you avoid such conflicts, and, finally, make the collaboration process as comfortable as possible.