|
Writing Help Topics / Dynamic Styles / Dynamic Styles: Overview |
Send comments on this topic |
Using Styles for Text Formatting
HelpSmith allows you to use styles which store formatting settings for text, paragraphs, bulleted and numbered lists, and tables. Depending on the style type, a style stores different formatting attributes, such as font name, font size, color, paragraph alignment, list type, table borders and backgrounds, etc.
Key Benefits of Styles
Styles provide you with a number of benefits for formatting content of your topics:
•Setup and apply a single set of styles for all the topics in the entire help project.
•Quickly update formatting of content by editing the associated styles.
•Define alternative view of a specific style in different documentation formats.
•Import styles from another help project.
Remark: The HelpSmith's word processor is completely based on styles, which means that it stores formatting settings by using styles even when you change font, paragraph, or list settings directly in the editor.
Show the Styles Pane
The Styles pane displays the styles of the current help project. If you do not see the Styles pane, on the View tab, click Styles to display it.
Depending on the program options, the Styles pane can display or hide particular types of styles. For example, if you want to see not only the reserved and user-defined styles, but also auto-created styles, you can change the appropriate options here.
Using the toolbar at the top of the Styles pane, you can add a new style, modify an existing style, delete a style, and apply a style to the content which is selected in the word processor.
Add a New Style
1.On the View tab, in the Tool Panels & Toolbars group, click Styles.
2.On the toolbar at the top of the Styles pane, click New Style.
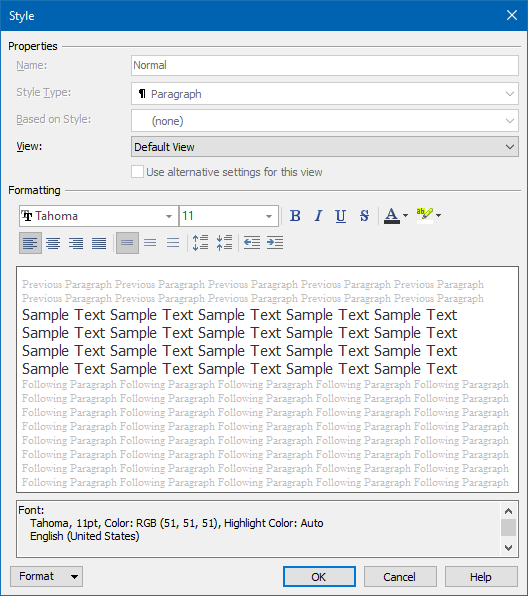
3.In the Style dialog, enter a style name, select the needed style type, and, if necessary, set a base style whose formatting will be inherited by the new style.
4.Define formatting settings of the new style according to your needs.
5.Click OK.

Editing Formatting Settings of a Style
Modify a Style
1.On the View tab, in the Tool Panels & Toolbars group, click Styles.
2.In the Styles pane, click the style that you want to modify.
3.On the toolbar at the top of the Styles pane, click Modify.
4.In the Style dialog, change the formatting settings that you need.
5.Click OK.
Delete a Style
1.On the View tab, in the Tool Panels & Toolbars group, click Styles.
2.In the Styles pane, click the style that you want to delete.
3.On the toolbar at the top of the Styles pane, click Delete Style.
Apply a Style to the Selected Content
1.On the View tab, in the Tool Panels & Toolbars group, click Styles.
2.In the word processor, select the content that you want to link with a style.
Remark: For example, you can select one or more paragraphs, a fragment of text in a paragraph, bulleted or numbered list, table etc.
3.On the Styles pane, select the style that you want to apply, and then click Apply Style on the toolbar.
Alternatively, you can simply double-click on the style that you need.
Find Where a Style is Used
HelpSmith allows you to find content (e.g. text, paragraphs, lists, tables, etc.) which uses a specific style in the topics and templates.
1.On the View tab, in the Tool Panels & Toolbars group, click Styles.
2.In the Styles pane, right-click on the style that you want to find in the topics and templates, and then click Find in Topics.
3.In the Find and Replace window, on the Go To tab, use the Next button to find the next object which uses the selected style.
Replace a Style
HelpSmith allows you to find content (e.g. text, paragraphs, lists, tables, etc.) which uses a specific style, and link it with another style.
1.On the View tab, in the Tool Panels & Toolbars group, click Styles.
2.In the Styles pane, right-click on the style that you want to replace, and then click Replace Style.
3.In the Replace Style dialog, specify the style by which you want to replace the first style.
4.Specify where you want to find and replace the selected style.
For example, you can replace the style in the current topic or template only, or in all the topics and templates.
5.Click Replace Style.
Related Links
Copyright © 2007-2026 HelpSmith.com