
|
Getting Started / Media Repository |
Send comments on this topic |
The media repository stores all the image and video files that are used in your help project. When you save the help project, the media repository is saved to a sub-folder which is located in the same directory as your project file.
View and Edit the Media Repository
To view and edit the media repository of your help project:
1.On the Project tab, in the Project group, click Project Objects.
2.In the drop-down menu, click Media Repository.
The Benefits of a Media Repository
A single media repository that stores all the image and video files that are used in your help project provides a number of benefits:
•When you insert images or videos from different directories on your computer, you do not have to worry about copying the files from their original locations to the same folder with your help project.
•If you need to copy or move an entire help project to another computer, or storage device, you do not have to copy individual media files from different locations.
•If you delete an original image or video file, your help project will still have its own copy of the media file.
•When you need to update an image (for example, a screenshot) that is used in more that one topic, you can simply update it in the Media Repository window. This will automatically update the corresponding images in the topics.
•An easy way to find and remove the image files that are not used in your help project.
Editing the Media Repository
Please note that when you add new files, rename or delete existing files, or change the structure of folders in the Media Repository, the changes to the media repository folder will apply after you save your help project by clicking File|Save (or by pressing Ctrl+S).
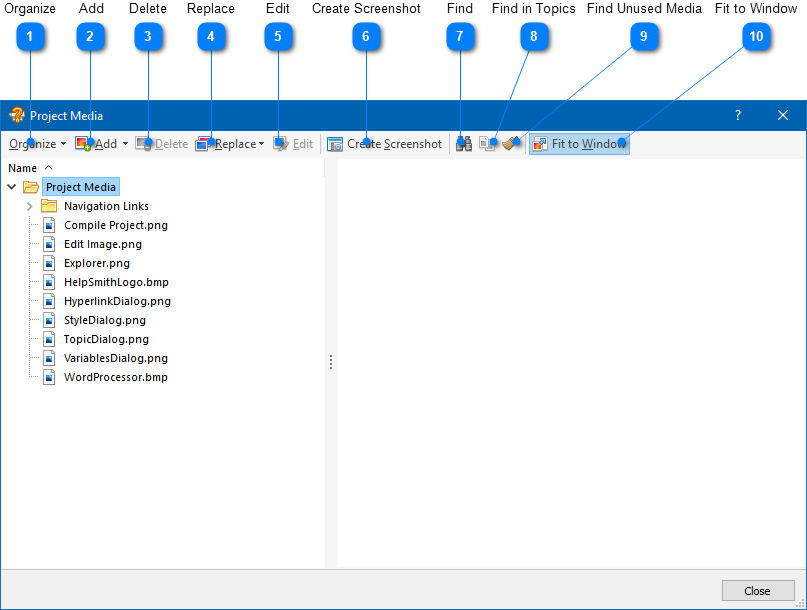
Media Repository Window
|
Organize |
|
|
Contains different actions that you can apply to the file list, or to the selected file or folder. For example, you can access the Clipboard commands, change the sorting direction of the file list, rename a selected file, etc. |
|
|
|
|
|
Add |
|
|
Allows you to add a new file(s) to the selected folder, or to add a new folder (group) to the media library. |
|
|
|
|
|
Replace |
|
|
Allows you to update the selected file by replacing it with another file, or with the image contained in the Clipboard. |
|
|
|
|
|
Edit |
|
|
Opens the Image Tool that you can use to replace the selected image by capturing a new screenshot, or by removing unwanted parts of the image with the Crop tool. |
|
|
|
|
|
Create Screenshot |
|
|
Opens the Image Tool that you can use to capture a screenshot that will be added to the selected folder. |
|
|
|
|
|
Find |
|
|
Allows you to find a file contained in the media repository by its filename (or by a part of the filename). |
|
|
|
|
|
Find in Topics |
|
|
Allows you to find where the selected media file is used in the topics and templates. |
|
|
|
|
|
Find Unused Media |
|
|
Allows you to find the media files that are not used in the topics and other places in your help project. If unused files are found, you will be able to choose if you want to select them in the file list, or to remove them from the media repository. |
|
|
|
|
Related Links
Copyright © 2007-2026 HelpSmith.com